SCOUT Studio. Geozones
Table of Contents
Introduction
Geozone is a virtual, arbitrarily limited area on a geographical map. Geozones can be used, for example, to track vehicle visits to a specific address, city, or any range of addresses.
Geozones editor
To manage geozones, SCOUT Studio provides a separate functional module - Geozones Editor. Access to it is carried out by activating the Geozones Editor button in the main menu of SCOUT Studio (Figure 1).
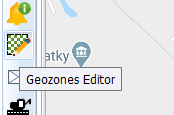
Figure 1 - Geozones Editor control
Geozones Editor includes (Figure 2):
- Search bar for geozones and groups of geozones;
- Tool menu;
- List of geozones.
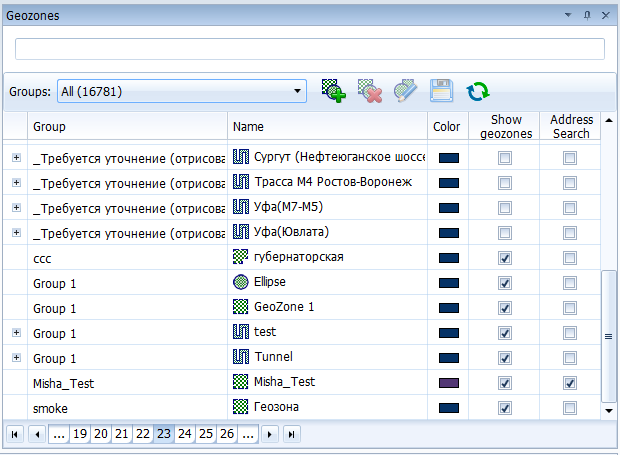
Figure 2 - Geozones editor
The search bar allows you to search for the names of both, geozones (Figure 3) and groups of geozones (Figure 4).
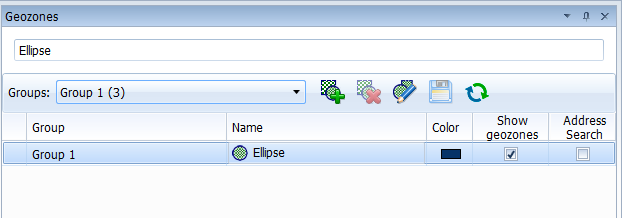
Figure 3 - Search for geozone names
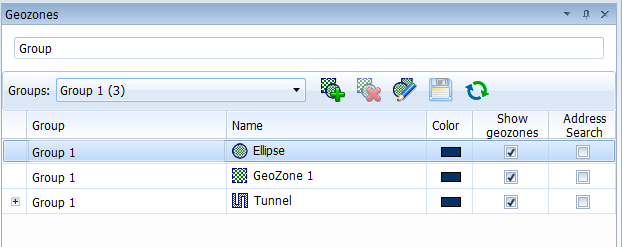
Figure 4 - Search for geozone group name
Tool menu includes the following buttons:
- Add group (
 ) - adds a new group of geozones;
 - Delete group (
 ) - deletes an existing group of geozones;
 - Edit group (
 ) - edits the selected group of the geozones;
 - Save (
 ) - saves changes made with geozones;
 - Update (
 ) - updates a list of geozons available to a specific user from the server.
Note! The drop-down list allows you to go to specific groups of geozones using the built-in search when entering the first letters of their name (Figure 5).
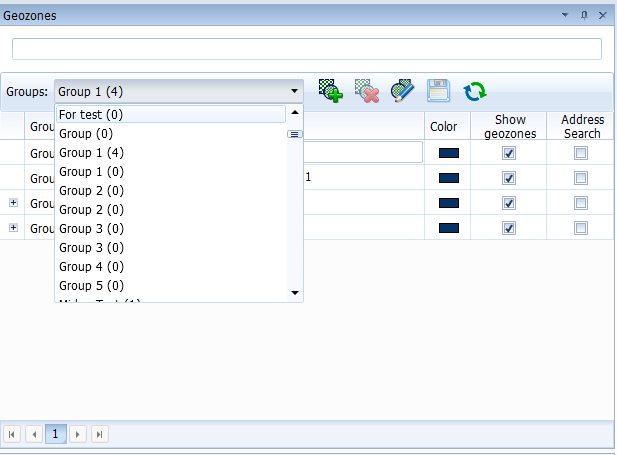
Figure 5 - Drop-down list for selecting and searching for geozone groups
The list of geozones (Figure 6) displays either all geozones available to a particular user, or the results of a search performed on them. Additionally, it is possible to set three attributes for geozones:
- Color;
- Show geozones - all geozones are simultaneously displayed on the map;
- Address search - if the monitoring object is located inside the geozones with this attribute set, their names will be additionally displayed in the fields with the location.
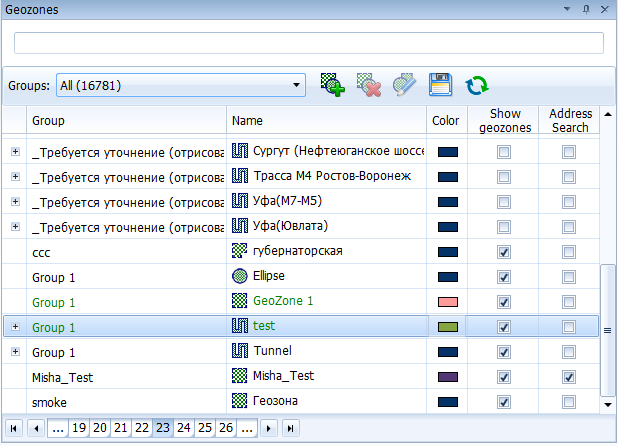
Figure 6 - List of geozones
Note! The Edit Group control element enables you to change attributes immediately for all geozones that are part of the selected group (Figure 7).
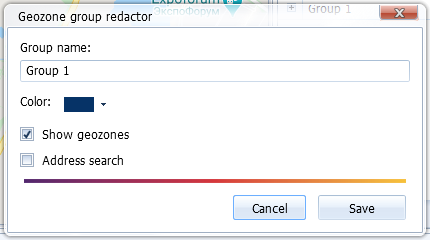
Figure 7 - Change the attributes of all geozones of the selected group
Additional panel of the geozone editor
When the geozone editing module is activated, an additional panel with the tools for creating and editing geozones is automatically displayed. (Figure 8).
Note! This panel can be moved anywhere on the screen.

Figure 8 - Additional panel of the geozone editor
The additional panel contains the following tools:
- Add a rectangle geozone (
 );
); - Add a polygon geozone (
 );
); - Add an ellipse geozone (
 );
); - Add a tunnel geozone (
 );
); - Add a POI geozone (
 );
); - Change transparency (
 );
); - Delete the geozone (
 );
); - Edit geozone (
 );
); - Do not show / Show geozones (
 ) - activates or deactivates the simultaneous display of geozones on the map with the attribute Show geozones.
Geozone Creation
Note! Creating geozones is possible only within the selected group of geozones. The controls for creating geozones will remain inactive until a group of geozones is available for editing in the geozone editor.
Rectangle geozone
To create a rectangle geozone, select the appropriate control element in the additional panel of the geozone editor. Use the mouse to draw a rectangle on the needed map area (Figure 9).
Editing a rectangle geozone involves either moving the associated corner marks of an existing area, or moving the entire area.
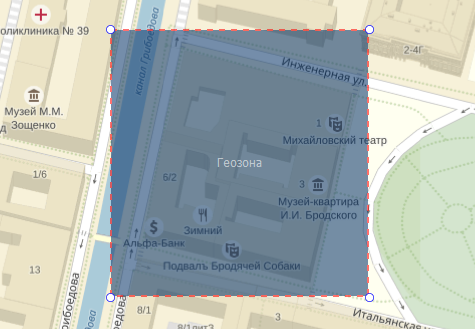
Figure 9 - Rectangle geozone
Note! When creating for each type of geozones, there are certain parameters that can be changed in the special drop-down area of the additional panel of the geozones editor or in the list of geozones of the geozones editor module. For rectangle, polygon and ellipse geozones such parameter is the colour (Figure 10).
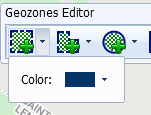
Figure 10 - Geozone Color parameter
Polygon geozone
To create a polygon geozone, select the appropriate control element in the additional panel of the geozone editor, and then sequentially outline the contour of the desired area using labels (Figure 11).
Editing a polygon geozone involves moving existing contour marks, adding new intermediate marks, and moving the entire zone.
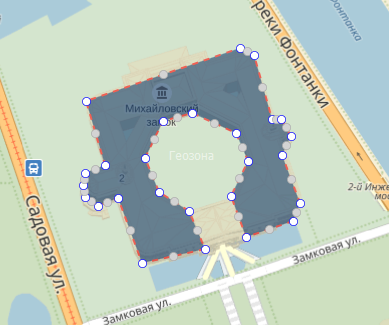
Figure 11 - Polygon geozone
Ellipse geozone
To create an ellipse geozone, select the appropriate control element in the additional panel of the geozone editor. Use the mouse to draw an ellipse on the needed map area. The created geozone will be an ellipse inscribed in a rectangle area (Figure 12).
Editing an ellipse geozone involves either moving the corner marks of an existing area or moving the entire area.
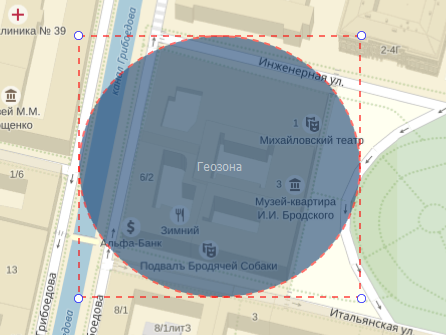
Figure 12 - Ellipse geozone
Tunnel geozone
To create a tunnel geozone, select the appropriate control element in the additional panel of the geozone editor, and then draw a route using labels (Figure 13).
Editing a tunnel geozone means changing the path by transferring existing labels, adding intermediate ones, or transferring the entire zone.

Figure 13 - Tunnel geozone
Tunnel geozone has two parameters: the colour and width of the tunnel (Figure 14).
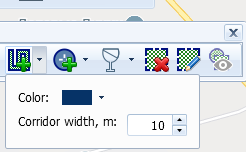
Figure 14 - Parameters of a tunnel geozone
POI Geozone
To create a POI geozone, select the appropriate control element in the additional panel of the geozone editor, and then select a point on the map as the center of the future geozone (Figure 15).
You can change the center point and radius of a POI geozone or move the entire geozone to edit it.
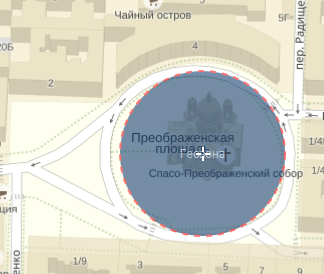
Figure 15 - POI geozone
A POI geozone has two parameters: the colour and radius (Figure 16).
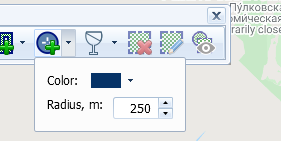
Figure 16 - Parameters of the POI geozone
Note! When the first geozone of any type is created, the corresponding group of geozones goes into edit mode. This mode allows you to sequentially create the necessary geozones, change their parameters and sizes. Once all the changes have been completed, press Save to save the changes (Figure 17).
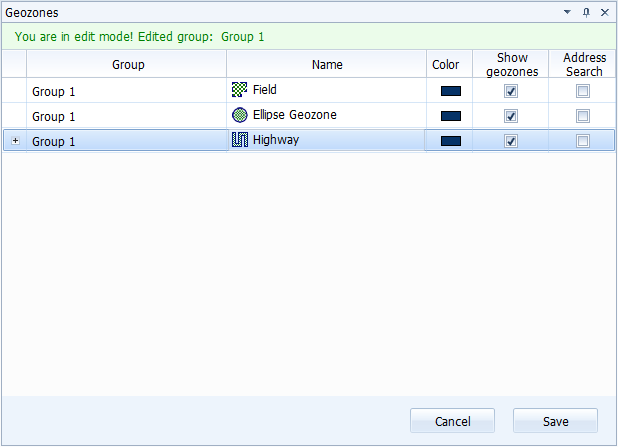
Figure 17 - Creation and editing mode of geozones
If a wrong label has been created, cancel the action by right-clicking on the label.
Note! Editing existing geozones, for example, tweaking their transparency (Figure 18), changes the name of the geozones in the list of the editing module to green, thereby highlighting them (Figure 19). Remember to activate the Save button to save changes.

Figure 18 - Changing the transparency of the geozone
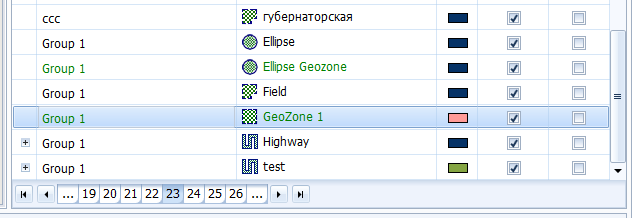
Figure 19 - Display of geozones with unsaved changes
The context menu (Figure 20) enables you to do the following actions:
- Add a comment to the selected geozone (Figure 21);
- Calculate the area of the selected geozone (Figure 22);
- Delete the selected geozone;
- Move the geozone to the selected group (Figure 23).
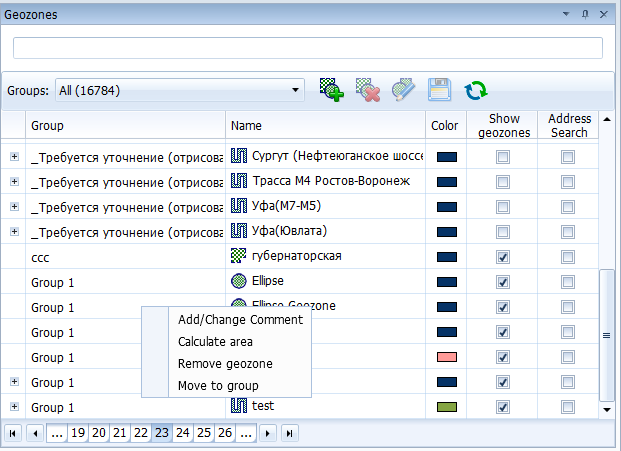
Figure 20 - Context menu of the list of geozones
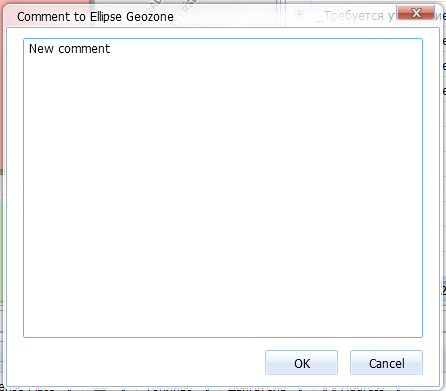
Figure 21 - Creating a comment for the geozone
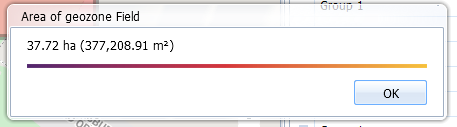
Figure 22 - Calculation of the area of the geozone
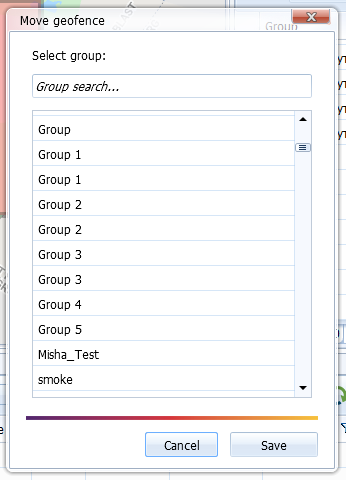
Figure 23 - Moving a geozone to another group.
Article Number: 3405
Author: Fri, Mar 20, 2020
Last Updated: Fri, May 22, 2020
Author: Анисимов Максим Михайлович [m.anisimov@scout-gps.ru]
Online URL: https://kb.scout-gps.ru/article/scout-studio-geozones-3405.html